How To Install Blink Doorbell Camera Simple Steps Explained
Remember that frustrating moment when you missed a delivery and had no idea who was at your door? I was there, constantly worrying about packages and feeling disconnected. That’s when I decided to get a smart doorbell. It transformed everything. This guide will walk you through how to install blink doorbell camera, so you can enjoy the same peace of mind. You’ll gain a clear, step-by-step installation process and learn how to troubleshoot common issues. By following this guide, you will be able to set up your doorbell efficiently, improving your sense of security and making your home smarter. Get ready to learn, and ensure you never miss another important visitor or package again.
Key Takeaways
- Learn the initial steps needed before you can start installing your Blink Doorbell Camera.
- Discover the essential tools required to set up the Blink Doorbell Camera.
- Follow a step-by-step guide to install the doorbell using existing wiring.
- Understand how to install the Blink Doorbell Camera without existing wiring.
- Explore the process of connecting your camera to the Blink app and your home network.
- Find ways to effectively troubleshoot common installation problems with your device.
Preparing for Installation of Your Blink Doorbell Camera
Before beginning the how to install blink doorbell camera process, gather your supplies and prepare the area. This preliminary stage is important for a smooth setup. Ensure you have all the necessary components and understand where you will place your new doorbell. Proper preparation will save time and potential frustration. Consider the location and its distance from your Wi-Fi router. A strong Wi-Fi signal is necessary for proper operation, and knowing where you will mount it ensures that the camera has the best possible performance.
Gathering Essential Components
Carefully unpack your Blink Doorbell Camera kit. Make sure everything that is supposed to be included is present. This commonly includes the doorbell unit itself, the mounting bracket, a release tool, a screwdriver, screws, and possibly a chime adapter. Check for any missing parts immediately. Contact customer service if anything is missing or damaged. Checking the included instructions is important too as it provides additional details. Not all kits contain the same accessories, but usually include the above mentioned essentials.
- Doorbell Unit: This is the main component. Verify it is in good condition and has not been damaged during shipping. The unit houses the camera, microphone, and speaker, allowing for two-way communication and video recording.
- Mounting Bracket: This is a key piece. It secures the doorbell to the wall or door frame. It is the base on which the doorbell sits and is usually attached with screws.
- Release Tool: This small tool helps detach the doorbell from the mounting bracket, usually for battery replacement or maintenance. Losing the release tool can make it hard to work on the camera.
- Screwdriver: A screwdriver, often included in the kit, is needed to attach the mounting bracket and connect wires, if you are using existing doorbell wiring. Phillips head screwdrivers are the most common type used.
- Screws: Screws of different sizes are typically supplied to attach the mounting bracket to the wall. Select the right screws based on the material of your wall (wood, brick, or siding).
- Chime Adapter: This small component is required to get your existing mechanical or digital chime to function with your Blink Doorbell Camera. This device will connect your home’s chime system to the camera.
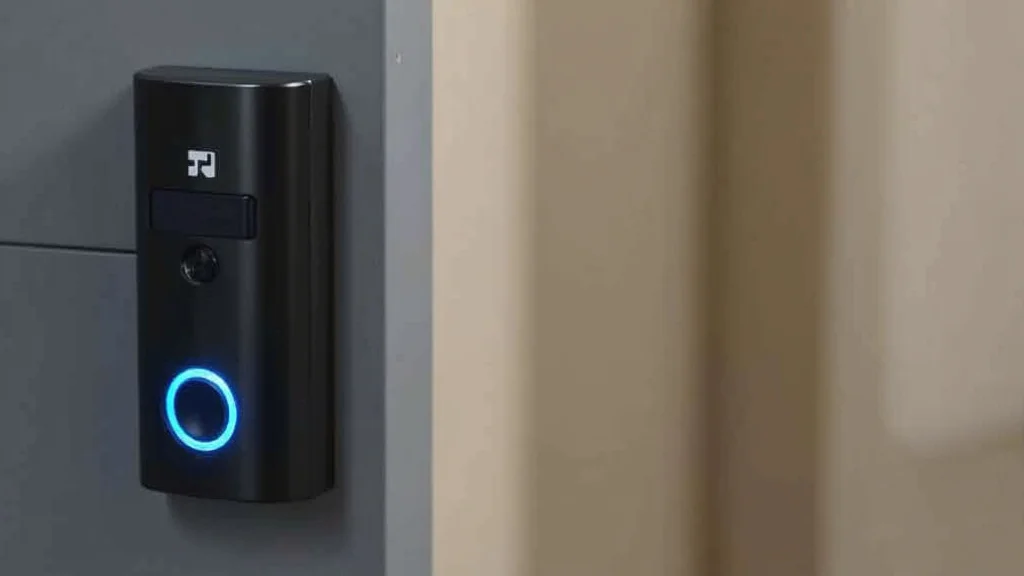
Selecting the Ideal Location
The position of your Blink Doorbell Camera affects both its performance and user experience. Choose a location that offers a clear view of your entryway. Consider the camera’s field of view; a wider view ensures you capture more footage. The optimal height is usually about four to five feet above the ground. This height will offer the best combination of clear viewing and easy access for maintenance.
- Field of View: Position the doorbell to maximize the view. Make sure it sees the entire entryway, including any approach paths. This will help you see packages left on the porch and the person ringing the doorbell.
- Height: Install the doorbell at a height that provides a good view without being easily tampered with. It should be high enough to avoid getting knocked but low enough so you can see faces.
- Wi-Fi Signal Strength: Assess the strength of your Wi-Fi signal at the installation location. If the signal is weak, consider moving your router closer or using a Wi-Fi extender.
- Sunlight and Shadows: Direct sunlight can sometimes impact the camera’s image quality. Try to avoid placing the doorbell where it will be directly hit by the sun’s glare, if possible.
Installing the Blink Doorbell Camera Using Existing Wiring
If you already have a wired doorbell, you can easily
Turning off the Power and Removing the Old Doorbell
Before any work begins, go to your home’s electrical panel and switch off the circuit breaker that controls the doorbell. Locate the circuit breaker, which is often labeled “doorbell” or “chime.” If you cannot find it, turn off the main breaker. Use a non-contact voltage tester to verify the wires are no longer receiving power. Remove the old doorbell by unscrewing it from the wall and disconnecting the wires. Remember how the wires were connected to your old doorbell.
- Locating the Breaker: Check your breaker panel. Look for a breaker labeled “doorbell” or “chime.” If you cannot identify the correct breaker, turn off the main breaker. This protects you from electrical shock.
- Verifying Power is Off: Use a non-contact voltage tester on the wires to confirm that the power is off. If the tester lights up or beeps, the power is still on; double-check the breaker.
- Removing the Old Doorbell: Unscrew the old doorbell from the wall. Disconnect the wires from the terminals. It’s often helpful to take a picture of the wiring configuration before disconnecting the wires for reference.
- Wire Nuts or Connectors: Before you connect the new doorbell, you may need to use wire nuts or connectors to secure the existing doorbell wires to the new unit.
Wiring the Blink Doorbell Camera
After you have removed the old doorbell and confirmed the power is off, it is time to connect the Blink Doorbell Camera. Use the screws provided to connect the mounting bracket to the wall. Attach the doorbell’s wires to the corresponding terminals on the back of the Blink Doorbell Camera. Make sure that the wires are firmly secured. For wired installations, the doorbell often uses two terminals for power. If you are uncertain about the wiring, it is best to consult the installation manual for detailed instructions or contact an electrician.
- Mounting the Bracket: Place the mounting bracket on the wall where the old doorbell was. Use the screws provided to secure it firmly. Make sure it is level.
- Connecting the Wires: Connect the wires from your home’s wiring to the terminals on the back of the Blink Doorbell Camera. The wires often are labelled as “AC” or “power”. The wires might be black and white.
- Securing the Wires: Make sure the wires are securely connected to the terminals. Loose connections can lead to performance issues or failure. Ensure all connections are tight.
- Attaching the Doorbell: Once the wires are connected, align the Blink Doorbell Camera with the mounting bracket. Snap or screw the doorbell onto the bracket, depending on the design.
Connecting the Chime Adapter (If Applicable)
If you have an existing chime, you will need to install the chime adapter. This device makes the Blink Doorbell Camera work with your existing doorbell chime system. The adapter is typically placed inside the chime unit. It helps ensure that when someone rings the doorbell, your existing chime sounds. Without the chime adapter, the existing chime might not work. Always follow the installation instructions of the Blink Doorbell Camera.
- Locating Your Chime: Typically, the chime is located inside your home. It might be near the front door, in a hallway, or close to your electrical panel.
- Opening the Chime Unit: Unmount the chime unit by removing its cover. Note the wires connected to the chime terminals. This will help you know how to install the adapter.
- Installing the Adapter: The chime adapter connects to the terminals on your existing chime unit. It can vary depending on the chime type and model of the adapter.
- Testing the System: After installing the chime adapter, test the doorbell. When the doorbell button is pressed, the chime should sound. Also check if the video and audio features are working correctly.
Installing the Blink Doorbell Camera Without Existing Wiring
If you do not have existing doorbell wiring, you will need to use the battery-powered option. The battery-powered how to install blink doorbell camera is easier to install, because you do not need to deal with electrical wiring. This option is a great alternative for renters or anyone who cannot or does not want to deal with wiring. Remember to regularly check and change the batteries. This will help ensure uninterrupted service. Battery life depends on usage and settings. Typically, it can last for several months.
Preparing for Battery Power
The Blink Doorbell Camera is typically battery-operated. Before installation, make sure you have the correct type of batteries. Most models use AA batteries. Insert the batteries into the doorbell following the instructions provided. Check the battery compartment to confirm that the batteries are properly seated. The correct placement is important to ensure the doorbell functions correctly. You may want to use a rechargeable battery system to minimize waste.
- Battery Type: Most Blink Doorbell Cameras use AA batteries. Check the manual or the device itself to make sure which type is required. Avoid mixing old and new batteries or using different battery types.
- Inserting Batteries: Open the battery compartment. Insert the batteries, following the polarity markings (+ and -) inside the compartment. Polarity is critical, so be precise.
- Battery Life: Battery life can vary depending on usage, settings, and environmental conditions. Expect several months of operation, but this can change. Consider purchasing rechargeable batteries.
- Charging: If you are using rechargeable batteries, have a charger ready. You may need to recharge the batteries periodically. Keep extra sets of batteries on hand.
Mounting the Doorbell and Setting Up
Mounting a battery-powered Blink Doorbell Camera involves attaching the mounting bracket to the wall. Then, you simply snap the doorbell onto the bracket. Position the bracket at the desired height and angle. Use a level to ensure it is straight. Use the screws provided to secure the bracket. Make sure the bracket is firmly attached to the wall, and the doorbell is securely mounted. After mounting, the last step is to connect to the Blink app and test the camera’s features.
- Attaching the Mounting Bracket: Place the mounting bracket on the wall. Use the screws provided to securely fasten it. Make sure it is level and at a comfortable height.
- Positioning the Doorbell: Consider the angle. You want a clear view of your entryway. Make sure the doorbell is not obstructed by anything that can limit its view.
- Securing the Doorbell: Snap or screw the Blink Doorbell Camera onto the mounting bracket. Refer to the manufacturer’s instructions. This may include a locking mechanism.
- Testing and Setup: After mounting, test the doorbell by pressing the button. Then, connect to the Blink app. Verify the video and audio are working as they should be.
Connecting Your Doorbell to the Blink App and Wi-Fi
After physically installing the how to install blink doorbell camera, you will connect it to your home network via the Blink app. The app allows you to view live video, receive notifications, and access recorded events. The initial setup requires creating or logging into your Blink account, adding the device, and connecting to your Wi-Fi network. After connecting, test the system and adjust the settings. The Blink app is crucial for your doorbell camera’s operation, and it also enables many useful features.
Downloading and Installing the Blink App
Download the Blink app from either the Apple App Store (iOS devices) or the Google Play Store (Android devices). Open the app after it installs on your device. Create an account or log in if you already have one. You will also have to give the app permissions for notifications and access to your device’s settings. The app guides you through the process of adding your new device. Keeping the app updated is important, because updates often include improvements and security patches.
- App Store or Google Play: Go to the app store or Google Play Store, search for “Blink,” and download the official app. Make sure you get the right app.
- Creating an Account: Open the app and create an account. Provide your email address and create a secure password. Make sure the email is correct.
- Logging In: If you already have an account, log in using your credentials.
- Permissions: The app will ask for certain permissions. Grant the necessary permissions, such as for notifications and access to your device settings.
Adding Your Doorbell to the App
After you have installed the app and set up your account, it is time to add the doorbell to the app. In the app, you will find an option to add a new device. The app guides you through the process, often by scanning a QR code on the doorbell. The app will then prompt you to connect to your home Wi-Fi network. Make sure your Wi-Fi password is correct, and the device is within range of your router. Follow all the on-screen instructions. Once connected, you can then customize the settings of your device.
- Adding the Device: In the app, find the option to add a new device. This is usually indicated by a plus sign or an “Add Device” button. Select it.
- Scanning the QR Code: The app will prompt you to scan a QR code. This code is found on your Blink Doorbell Camera, typically on the back or inside the battery compartment.
- Connecting to Wi-Fi: The app will ask you to connect to your home Wi-Fi network. Select your network from the list, and enter your password carefully.
- Completing Setup: Once connected to Wi-Fi, the app will continue the setup process. This might include naming your doorbell and adjusting settings.
Configuring Settings and Testing the Doorbell
After the doorbell is connected to the app, you can customize the settings to your preferences. Adjust video quality, motion detection sensitivity, and notification preferences. Test the doorbell by pressing the button and checking to see if you receive a notification on your smartphone. Verify that you can view live video and that the two-way audio works. You can then also set up features like activity zones. Regular testing helps you make sure everything is working correctly and ensures you are ready.
- Video Quality: In the app settings, you can adjust the video quality. Higher quality uses more battery and bandwidth. Select what works best.
- Motion Detection: Adjust the motion detection sensitivity. This controls how sensitive the camera is to movement. You can reduce false alarms.
- Notification Preferences: Set up how you want to receive notifications. Choose the type of alerts and how they are delivered (push notifications, email).
- Testing: Press the doorbell button and make sure you receive a notification on your smartphone. Verify you can view live video and use two-way audio.
Troubleshooting Common Installation Issues
During the how to install blink doorbell camera setup, you might experience issues. Common problems include Wi-Fi connection issues, problems with the chime, and device power failures. Fortunately, most of these problems can be resolved with basic troubleshooting steps. These steps include checking the power supply, making sure the Wi-Fi signal is strong, and consulting the Blink app. Addressing these problems immediately will help you get the device functioning.
Addressing Wi-Fi Connection Problems
Wi-Fi connection issues are a common problem. Make sure your doorbell is within range of your Wi-Fi router. Check your router’s signal strength at the installation location. If the signal is weak, consider moving the router or using a Wi-Fi extender. Also, try restarting your router and your doorbell. If the problem continues, check your network configuration and confirm that your Wi-Fi password is correct. Incorrect Wi-Fi details are a frequent reason for failed connections.
- Check Wi-Fi Signal Strength: Use your phone or another device to check the signal strength at the doorbell’s location. A weak signal can prevent proper operation.
- Restart the Router: Reboot your Wi-Fi router. This can resolve temporary connectivity issues and improve the signal. Wait a few minutes before trying again.
- Check Your Password: Make sure you entered your Wi-Fi password correctly. Incorrect passwords are a common cause of connectivity problems.
- Router Interference: Other devices can sometimes cause interference. Try to reduce any possible interference by repositioning the router or other electronic devices.
Troubleshooting Chime Issues
If your existing chime is not working with the Blink Doorbell Camera, there might be a wiring or configuration problem. Ensure the chime adapter is installed correctly. Verify that the chime wires are properly connected. Check the settings in the Blink app to ensure the chime is enabled. Refer to the Blink Doorbell Camera’s manual for chime compatibility. If you are uncertain about the wiring, it is best to contact an electrician. Many of these issues can be resolved with a few simple steps.
- Verify Chime Adapter Installation: Make sure the chime adapter is installed correctly. Follow the manufacturer’s instructions. Wrong installation is a frequent error.
- Check Wiring Connections: Review all wiring connections at both the doorbell and the chime. Make sure the wires are securely connected and making good contact.
- Enable Chime in App Settings: Go to the Blink app settings and verify that the chime is enabled. If disabled, enable the setting. This tells the system to activate your chime.
- Chime Compatibility: Confirm that your chime is compatible with the Blink Doorbell Camera. Not all chimes work. Check the manual. If in doubt, contact support.
Dealing with Power and Battery Problems
Power-related issues can include low battery warnings or the doorbell not working at all. For battery-powered doorbells, check the batteries and replace them if necessary. For wired doorbells, make sure the power is turned on at the circuit breaker. If the problem continues, there might be a wiring issue. If using batteries, consider rechargeable batteries to save money and the environment. Keep spare batteries on hand. Always contact support if the issues continue after you have completed these steps.
- Check the Batteries: If your doorbell is battery-powered, check the batteries. Replace them if they are low. Use the correct battery type and ensure the polarity is correct.
- Check the Breaker: For wired doorbells, verify the circuit breaker is on. The breaker is typically labeled “doorbell” or “chime.” This is one of the easiest steps to check.
- Inspect Wiring: Examine the wiring connections for any damage or loose connections. Make sure that the wires are properly connected. Loose wiring can cause many problems.
- Power Supply: If the problem persists, there may be an issue with the power supply. Consult a professional. This is especially true if there are wiring or electrical concerns.
Common Myths Debunked
Myth 1: Installing a Smart Doorbell is Difficult
Many people assume that installing a smart doorbell is complex and requires advanced technical skills. While it may seem complicated, the truth is that most smart doorbells, like the Blink Doorbell Camera, are designed for easy installation. Manufacturers provide clear instructions, and the process primarily involves following step-by-step guidelines. The process usually only takes a few minutes, even for those with limited technical experience. If you are comfortable with basic tasks, you can likely complete the installation. Many online resources are also available to assist you.
Myth 2: Smart Doorbell Cameras Are Easily Hacked
Another common misconception is that smart doorbell cameras are easily susceptible to hacking. While it is true that any connected device is at some risk, modern smart doorbells include security features that make hacking very difficult. This includes encryption, secure Wi-Fi protocols, and two-factor authentication. Manufacturers frequently update their firmware to patch security vulnerabilities. Therefore, by using strong passwords, keeping your app and firmware updated, and following basic security guidelines, you can significantly reduce the chances of a security breach.
Myth 3: Smart Doorbells Always Require Professional Installation
Some people believe that smart doorbells must be professionally installed. However, this is not correct for many models, including the Blink Doorbell Camera. Most smart doorbells are designed for DIY installation. The kits include all the required components and provide simple instructions that anyone can follow. Professional installation is unnecessary. However, if you are not comfortable with electrical work, or if your home’s wiring is complicated, getting a professional might be a good idea. This ensures the job is done correctly.
Myth 4: Smart Doorbell Cameras Drain Wi-Fi and Slow Down Internet
A common concern is that smart doorbells can significantly slow down your Wi-Fi and internet speed. While smart doorbells use your Wi-Fi, the bandwidth required is generally minimal. Modern Wi-Fi systems and routers are designed to handle multiple devices, so one doorbell is unlikely to make a big difference. However, if you are experiencing performance issues, there are several things you can do. You can check your Wi-Fi signal strength at the installation point. You can also prioritize your doorbell’s traffic in your router settings. This will give it more bandwidth. You can also upgrade your router if needed.
Myth 5: Smart Doorbell Cameras Are Only for Tech-Savvy People
Some people assume that smart doorbell cameras are only for those who are highly knowledgeable about technology. The truth is that smart doorbells are designed to be user-friendly, so anyone can use them. The setup is typically simple, guided by an easy-to-use app. The apps include intuitive interfaces and simple settings for adjusting the camera. There are detailed user manuals. If you are capable of using a smartphone or tablet, you can set up and use a smart doorbell. They are designed to improve home security and convenience for everyone, regardless of their technical knowledge.
Frequently Asked Questions
Question: What tools do I need to install a Blink Doorbell Camera?
Answer: You will typically need a screwdriver, screws, a drill, and possibly wire nuts or connectors if you are using existing doorbell wiring. Some kits include a screwdriver and other tools.
Question: Can I install the Blink Doorbell Camera if I don’t have existing wiring?
Answer: Yes, you can install the Blink Doorbell Camera using batteries. This option is perfect if you do not have any existing wiring or do not want to use it.
Question: How do I connect the Blink Doorbell Camera to my home’s Wi-Fi?
Answer: You connect the doorbell to your Wi-Fi using the Blink app. The app guides you through the process, and you enter your Wi-Fi network’s name and password.
Question: What do I do if my existing chime does not work with the Blink Doorbell Camera?
Answer: Ensure that the chime adapter is installed correctly, and verify the chime settings in the app. Also make sure your chime is compatible. Check the manuals for help.
Question: How long do the batteries last in a Blink Doorbell Camera?
Answer: The battery life depends on usage and settings. It can last for several months, but it’s a good idea to monitor the battery level and replace or recharge the batteries as needed.
Final Thoughts
Congratulations! You have completed the how to install blink doorbell camera guide. You now understand how to set up your new smart doorbell, whether you are using existing wiring or opting for the battery-powered version. From gathering the necessary components to connecting to the Blink app and troubleshooting common issues, you now have a comprehensive understanding. Remember to prioritize safety, especially when dealing with electrical wiring, and always follow the instructions carefully. By taking these steps, you can set up the Blink Doorbell Camera to keep your home safe and enhance its security features. It is time to enjoy the peace of mind knowing who is at your door and what is happening around your property.